Showing posts with label Recipes. Show all posts

Wednesday, July 30, 2014

Recipe Wednesday: Meat Potato Quiche

Preheat oven to 425°F (220°C). In a baking pan, stir together:

  • 3 cups coarsely chopped raw potatoes
  • 3 Tbsp. olive oil

Press evenly into pan. Bake for 20 minutes or until brown. Remove from oven. Layer on hot crust:

  • 1 cup grated cheese
  • ¾ cup meat (ham, sausage, chicken, hamburger etc.)
  • ¼ cup chopped onion

In a bowl, beat together:

  • 1 cup evaporated milk
  • 2 eggs
  • ½ tsp. salt
  • pepper

Pour egg mixture onto ingredients. Return to oven and bake about 39 minutes or until lightly browned. (You can also put corn flake crumbs mixed with butter on top.)

Enjoy!
-Jessica S.

Tuesday, July 22, 2014

Recipe: Italian Garlic Bread

...Give us this day our daily bread...Matthew 6:11...

What you will need:
  • 2 Tbsp. instant yeast
  • 3 cups warm water
  • 3 Tbsp. olive oil
  • 2 Tbsp. white sugar
  • 1 Tbsp. salt
  • 1 egg
  • 8-9 cups all purpose flour 
Mix yeast and warm water. Add oil, egg, sugar, and salt, mix well. Add flour till your dough is soft, yet not sticky. Mix Well, knead slightly. Divide dough four ways equally and roll out on floured or oiled surface. Roll up lengthwise; rolls should be about 1 foot long and 2-3" wide, or as you like. Slash four diagonal slashes across each loaf. Place on baking sheets, let rise. Bake at 350* until tops are lightly golden, or approx 20 or so minutes. I like to rub the tops with soft butter.

For Herb Garlic Butter: 
  • butter, softened
  • garlic powder, or freshly squeezed garlic cloves
  • Italian seasoning
  • Parmesan cheese
  • Parsley
  • whatever you would like you add! :) 
Mix ingredients together and serve with bread. 

Enjoy!!

(Note: this is a favorite recipe of my family. If made right, the bread is so soft and yummy. :D We make it often. Hope your family enjoys it as well! ~Rachel )


Thursday, June 19, 2014

Recipe Wednesday: Potato Pancakes

Our family has been making these forever and they are really, really, really, really good!

potato pancakes” by Olga Vasiljeva is licensed under CC BY-NC-SA 2.0

What you will need: (We make double this for our family of 12 people - play around with the quantities as you see fit.)
  • 2 eggs
  • 2 Tbsp. milk
  • 1 tsp. salt
  • 1 tsp. curry powder
  • 1 finely chopped onion
  • ½ tsp. celery salt
  • 1 pound (500 gm) grated potatoes (or just whiz them in a food processor if you are in a hurry)
  • ¼ cup flour

Directions:
Mix eggs, milk, onion and seasonings in a bowl. Add potatoes and flour. Mix well. Fry spoonfuls of mixture in oil for 2-3 minutes on each side. They’re best if served hot. :) Enjoy!

-Bonnie

Wednesday, June 4, 2014

Recipe Wednesday: Mint Chocolate Cookies

Mint Chocolate Cookies

Ingredients:

  • 2 ¾ cups flour
  • 1 ½ cups sugar
  • 1 tsp. baking soda
  • 1 egg
  • ½ tsp. baking powder
  • 1 tsp. mint extract
  • ½ tsp. salt
  • 15-20 drops green food coloring
  • 1 cup unsalted butter (at room temp.)
  • 1 bag Andes Mints (chopped)


Directions:
Preheat oven to 375°F (190°C). Sift the dry ingredients (flour, baking soda, baking powder, and salt) together and set aside. Unwrap the mints. In a large bowl, cream together butter and sugar until smooth. Beat in egg and mint extract. Gradually blend in the dry ingredients. Add green food coloring until evenly colored. Fold in the chopped Andes mints. Roll round teaspoon of dough into balls. Flatten and place onto ungreased cookie sheets. Bake for 8-10 minutes. Let stand on cookie sheets for 2 min. before moving them to wire racks to cool.

Note: These cookies are for those that like mint!
-Jessica S.

Wednesday, May 21, 2014

Recipe Wednesday: Vegan Pancakes

Lately the famous ‘THM diet’ has taken our community by storm. It’s a primarily weight loss diet, in which you separate your carbs from your fats, eat mainly carbs at one meal, then mainly fats at another. It’s also sugar free and has limited gluten.

Attracted by the sugar free idea, Mum and I looked into it. Not that we need to lose weight, but both of us have several allergies, that this ‘plan’ could accommodate.  Anyway a couple of ‘E’ meals and ‘S’ meals later, I decided that it wasn’t so much for me, I had a lot of air in my stomach, and would always be burping. Mum burps a lot when she is reacting to something, so I tried to find out what was wrong. Turns out that I might have been a bit extremist with my eating, after eating a few wheat crackers when I wasn’t mean to, my tummy stopped complaining.

Now this isn’t a THM critic report, I like many of the ideas in it, and I’m sure it works for many people, it just doesn’t work for me.

Anyway one of the things I learnt from it was how to cook without flour, by grinding up coconut flakes and rolled oats. So I began experimenting, next thing I was making almond milk and substituting constantly. We also have a Vegan staying at our place at the moment which is also stretching my cooking skills, but I’m loving it. I would never have found out how delicious cauliflower sauce is, or how scrumptious vegan pancakes are otherwise. It’s so liberating going into the kitchen and being able to make delicious vegan food without even realising it!

Vegan Pancakes

Ingredients:

  • 1 cup rolled oats
  • 1 cup flour (use coconut or nut flour for GF)
  • 2 tsp. baking powder
  • 1 tsp. guar-gum (probably optional, it basically thickens)
  • 1 banana, or any amount of fruit
  • cinnamon (optional)
  • vanilla
  • 3 tsp. sugar (or Nativa)
  • 1 tsp. salt
  • 1 Tbsp. margarine (optional)
  • rice milk (or any nut milk, or regular milk)


Directions:

Mix dry ingredients together, then add the wet ones. This mixture is meant to be quite thick, but you may need more liquid. Cook in a pan like regular pancakes.

This recipe is pretty flexible as you can see, I mean, I added my leftover smoothie the other day and it tasted really good. Also I’ve found if you add an egg or two it makes the thinnest, fastest cooking pancakes ever. This also tastes really good with whipped coconut cream and cooked apple.  It’s also really filling, you only need three before you’re stuffed—and I don’t get full easily.

-Tiffany

(This blog post was originally posted on her blog and then Tiffany suggested I [Esther] reshare it here.)

Wednesday, May 7, 2014

Recipe Wednesday: Chai Tea Latte

Mary Cassatt: Tea” by freeparking :-| is licensed under CC BY 2.0
Ingredients:
  • 2 cups water
  • 2 Lipton tea bags
  • 1 cinnamon stick
  • 1 whole clove
  • ¼ tsp. ground ginger
  • 2 ½ cups milk
  • ¼ cup sugar (or less)
  • whipped cream
  • ground cinnamon

Directions:
     Combine water, tea, cinnamon stick, clove, and ginger; bring to a boil. Reduce heat, cover and simmer for 5 minutes. Stir in milk and return to boil for 1 minute. Strain off nonliquid ingredients. Add sugar. Top with whipped cream and cinnamon.
     Note: I use Chai Tea instead of Lipton with spices.

A super good, warm drink on a winter or rainy day! :)
-Jessica S.

Tuesday, March 18, 2014

Recipe Wednesday: Happiness

Recipe for Happiness:

Mix together (preferably in a home inhabited by a family):
  • Lots of laughter
  • A sprinkle of fun
  • A cup (or two) of bright sunshine
  • A shelf of good books
  • Large doses of siblings playing together
  • Boxes of chocolate icecream
  • An abundance of hugs
 
Leave a minute or two to set, then open wide the doors and let it spill out into the surrounding neighbourhood. You can’t keep happiness contained for long.
 
(Note: It’s best when served fresh.)

Enjoy!
-Bonnie

Note from Esther: Thanks for the good recipe, Bonnie! While I find it slightly humorous, its still very true. Thanks for sharing.

And to everyone else: I’m always looking for more recipes, so if you have one you think others would appreciate please stop by our Submissions Page and send it in. Thanks!

Tuesday, March 4, 2014

Recipe Wednesday: Chocolate Mint Bars

Chocolate Mint Bars

Brownies mint” by Gabriela is
licensed under CC BY-NC-SA 2.0
Ingredients:
  Base:
  • 1 cup butter
  • 2 cup white sugar
  • 3 eggs
  • 1 tsp. vanilla
  • ¼ cup cocoa
  • 1 ½ cup flour
  • ¼ tsp. salt
  • ¾ cup chopped walnuts, optional

  Frosting:
  • 4 Tbsp. butter
  • 2 cup powdered sugar
  • 2 Tbsp. milk
  • 2 tsp. peppermint extract
  • Green food coloring

  Topping:
  • 3 oz. (90 gm) coating chocolate
  • 3 Tbsp. butter

Directions:
Base:  Preheat oven to 350°F (175°C). Cream butter and sugar. Beat in eggs and vanilla. Add cocoa, flour, salt, and nuts. Mix well. Pour into greased 9×13 pan. Bake for 30 minutes. Cool.

Frosting:  Cream butter; gradually add powered sugar, milk, peppermint extract, and food coloring. Frost cake and let set until frosting is firm.

Topping:  Melt chocolate with butter, spread over frosting. Chill 30 minutes, then cut into bars.

Rich and sweet, but good!
-Jessica

Tuesday, February 18, 2014

Recipe Wednesday: Mousetraps

Mousetraps (Cheese on Toast)

Butter some slices of bread (we use day old or two day old bread) and place on an oven tray.
licensed under CC BY-NC-SA 2.0

Cover the buttered bread with tomato sauce. This makes it taste really good!

Grate some cheese and sprinkle that on top. Now you can add slices of tomato, pineapple, capsicum or basically any fruit or vegetable! Note if you use something like potato you will want to boil or fry it first.

Sprinkle some mixed herbs on top now. You can also add a tiny pinch of ginger or something like that to spice it up even more!

Cook in the oven on Grill. They should only be in there for a few minutes or they will burn.

My family enjoys this tremendously. :) Enjoy!
-Elise

A note from Esther: I was surprised when I saw this recipe come in. It’s basically an embellished version of a common snack around our place. We usually spread some mayonnaise on bread, then put sliced cheese on that and grill it for a couple minutes. Then we serve it with prepared mustard.

If we don’t feel like doing the extra step, sometimes we’ll leave out the mayonnaise and just put plain cheese on the bread and melt it. It’s scrumptious! I think this version (above) would taste even better, though!

Also, we need more recipes—this is the last one. Have something to share? Please do not hesitate to stop by the Submissions Page and then hopefully we’ll have another recipe here in two weeks! Thank you!

Tuesday, February 4, 2014

Recipe Wednesday: Covered Grapes

A note from Esther: Today’s recipe is very simple. But it looks delicious, too! This is something I want to try sometime soon.

Also, this is the last recipe I have to share with all of you. If you have one you think others would enjoy, please do not hesitate to stop by the Submissions Page and then hopefully we’ll have another recipe here in two weeks! Thank you. :)
 

Covered Grapes

Ingredients:
  • 1 cup powdered sugar 
  • 1 cup sour cream 
  • 4 oz. (½ cup, 125g) cream cheese 
  • 1 tsp. vanilla 
  • Approximately 2 quarts grapes 

Directions:
Mix first 4 ingredients. Toss in grapes.

My whole family really likes these!! It’s so good…. :)-Jessica S.

Tuesday, January 21, 2014

Recipe Wednesday: Creamy Roasted Garlic Soup

A note from Esther: Hi, friends. I’m sorry this has taken so long to get up. You’d think that surely on one of those three previous weeks I would have remembered to start this but…well, here I am now. Hopefully I can remember in the future to get these posted! Today’s recipe looks scrumptious. I’ll have to remember to try it some day. God bless, and keep cooking for the King’s glory!

Creamy Roasted Garlic Soup

Submitters comment: This is a favorite recipe of our family’s. I have no idea where we picked it up from but it’s delicious.
 
Ingredients:
  • 8 Tbsp. butter (one stick) 
  • ½ onion, chopped 
  • 6 entire heads of roasted garlic, skins removed (see note below) 
  • ¾ cup flour 
  • 6 cups homemade chicken broth 
  • 1 tsp. Italian seasoning (see note below) 
  • 1 tsp. sea salt 
  • ¼ tsp. freshly ground black pepper 
  • 1 cup cream or milk 
  • Olive oil, balsamic vinegar and grated Parmesan cheese (optional garnishes)

Preparation:
Melt the butter in a medium size saucepan over medium heat. Add onions and saute for 5 minutes. Add all of the roasted garlic cloves and saute for 5 minutes more. Add the flour and stir thoroughly to combine. Cook for 3 to 4 minutes or until the flour is a light golden color. Add the broth one cup at a time, stirring and incorporating very well after each addition. Add Italian seasoning, salt, and pepper. Bring soup to a simmer and allow to cook for 15 minutes, stirring occasionally. Puree soup with an immersion blender or, if you don’t have one, in a regular blender in small batches. However you do it, make sure the soup returns to the saucepan and turn on the heat to low. Add cream. Stir and make sure the soup is thoroughly warmed. Taste it and adjust the spices to your taste. Serve garnished with Parmesan cheese, and drizzle of olive oil, and a splash of balsamic vinegar, if you wish. Any one or all of these make good additions to the soup.

Enjoy!


Notes:
To roast your garlic heads cut about ¼ – ½ of an inch off the top of the head exposing the individual heads. (If you don’t see some of the lower cloves, that’s alright, you can fish them out later, just make sure that most of them are showing.)

Remove any of the excess papery skin, but make sure you don’t remove it all! Put the heads top side down in a small pan and drizzle generously with olive oil, roast in a 375°F (191°C) oven for 40 – 45 minutes until garlic is golden brown but not burnt (I’ve done that a few times!). Once it is done, allow it to cool unless you are like me and don’t mind burnt fingers! Then squeeze the garlic cloves out from the skin. They should come out very easily. And that’s all there is to it!
 
The recipe for Italian seasoning is as follows.
  • 1 ½ tsp. garlic powder
  • 1 Tbsp. onion powder
  • 2 tsp. oregano
  • 1 Tbsp. dried parsley
  • 2 tsp. sea salt
  • 1 tsp. pepper
  • ¼ tsp. thyme
  • ½ tsp. dried celery flakes

Shake all ingredients together and store in a jar. This is also a good recipe to use in vinaigrette salad dressings and to season meatballs and sausage. Or anything else you think it might go with!
 
Also if you have a family of ten like I do six cups of soup is not going to be enough, so just add broth until the soup level is up to the point where you know it will be enough to feed your family. Then just add a little extra flour. If it clumps up a little, don’t worry that will disappear when you blend the soup. And adding a little more broth does not dilute the soup. Garlic goes a long way!

May God bless you as you cook for Him!
Christianna

Saturday, October 19, 2013

The Next Magazine

Hi, friends!

I’m working on compiling the next magazine (#8). Thanks to all you writers, we have enough articles to fill it! Thank you!

There are two things, though, that we still need. I’d like to have a recipes page. We still have two recipes from last time, but I thought that maybe if we have one more that will fill the page nicely (if you submit more than we need to fill the page we’ll just save it for next time). So if you’d like to submit a recipe, comment below or send it in via the form here:

Also, I’d like to ask you for your help for the encouragement page this time. Rachel took this on as her responsibility not too long ago, and that’s been great because I don’t have to come up with the things for it. But this time around she isn’t able to do it because her Mum is in the hospital with some problems (if you think about it, please pray for her!). So I wondered if maybe some of you wouldn’t mind helping us find things for the encouragement page? We’re looking for poems, special Bible verses, and inspiring quotes to go on there.

If you can think of (or find!) some, please send it in here (or you could comment below; it doesn’t matter):

Thank you for your support!

In Christ,
Esther
For the JOJ team.

Saturday, September 21, 2013

How to Cook a Pumpkin

I was helping Mum in the kitchen tonight, and told her about how I needed to come up with a post for JOJ. “You could tell how to cook a pumpkin!” She suggested. I wasn’t so sure about that because—truth be told—I was just learning myself for the first time how to do it!

After she told me that she hadn’t known how to cook a pumpkin until she was living by herself for a while, I felt a little better about it. So…here is how to cook a pumpkin!

First, select your pumpkin. This time, we used a Banana squash, but you could use any kind of pumpkin to do this. Cut it into quarters.

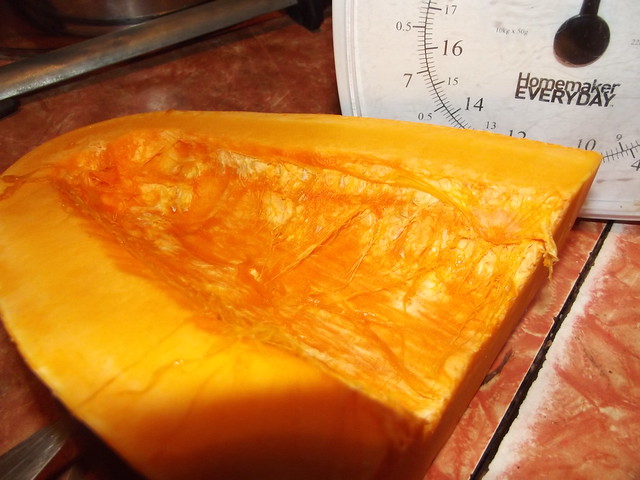
One of the quarters.
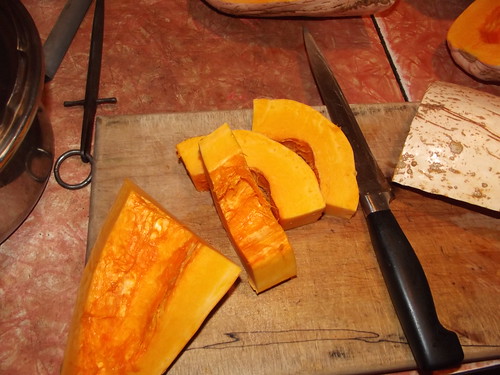
After cutting it into quarters, we scooped out the seeds and tried to get most of the strings out. It doesn’t matter if there are some left—you just want to take out the bulk of them.

If you want to, you could stop here and stick them in the oven like this (actually, if you are using something like the Grey pumpkin we can get here you wouldn’t even have to cut it into quarters—cut in half would work fine). If you wanted to do that, place them upside down (with the skin up) in a roaster pan. Bake at 175°C (350°F) for an hour, or until tender and well done.

Pumpkin wedges.

We decided to go further tonight, though, and cut it up into wedges about 1 inch (2 ½ cm) thick. For some of the wedges, we cut the quarters in half lengthwise, but for others we just left them whole.

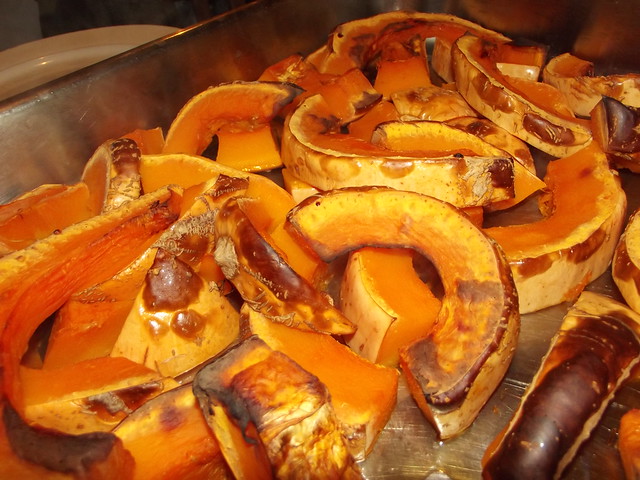
Finished and delicious!

Toss them into a roasting pan (like a baking sheet with deep sides—if you don’t have one, a baking sheet should work just fine), and bake at 175°C (350°F) for an hour, or until tender and well done. Serve with butter or gravy. Yum!

And that is how you cook a pumpkin. Well, one way anyway…. :)

Have a blessed weekend!
~Esther

Sunday, August 25, 2013

Recipes

Well, the time has come for me to begin putting together JOJ issue seven! My, how time does fly!

I’d like to thank each one of you for your support these last few months. I’d especially like to thank those who said they’d be willing to write for us—Bonnie, Cosette, Andrea, Rhoda and Rosie. I’m feeling very blessed by your willingness to write. Thank you SO much!

But most of that is beside the point. Today, I’m wondering if some of you others might not mind helping? I know we’ve done this before, but it never hurts to do a re-run. :) In this issue, we’d like to have a recipes page. Would you mind sharing a recipe with us to put in it? It doesn’t have to be any fancy recipe, just one that you enjoy making and others might as well. If you’d like to share one with us, comment below or you could fill out this form. :)

The more entries the better because that means that we can spread them out over more magazines! :)

Again, thank you so much for each word of encouragement you drop our way. I pray that you are encouraged as well! :)

God bless!
Esther

Monday, August 12, 2013

Chocolate Chip Cookies :)

source


Recently, I found a new recipe for Chocolate Chip Cookies, and since, I enjoy trying new recipes, not to mention I love chocolate, I just had to try it. :) It especially appealed to me, because it said they were soft and moist. Chocolate, and cookies that are soft, and moist?! This sounded great. :D Plus, the recipe for CCC that we have used quite a bit of butter and Crisco, and these didn't have near as much. 


It had 2 ingredients in it that I had never heard of as being in cookies before. You know what they were? Cream cheese, and cornstarch! 


So I tried it, and they were delicious!! :D The first time I made them, I couldn't find the cornstarch, so I used Glucomannan Powder. (A natural thickener, that we occasionally use.)  The second time I made them, I used cornstarch, which Mom had found. =D We (Mom and I) both thought that the first batch (with the Glucomannan) was softer than the one with cornstarch. But both ways were delicious =D 

Now after my ramblings...here is the recipe for you to try! =D Hope you enjoy!

(PS: My changes/notes are in italics/parentheses.)


~Softbatch Cream Cheese Chocolate Chip Cookies~  (Source)

INGREDIENTS:

1/2 cup (1 stick) unsalted butter, softened (I used salted butter, and didn't add any extra salt.)
1/4 cup cream cheese, softened (use cream cheese in a block or spreadable, don't use fat-free, light or whipped)
3/4 cup light brown sugar, packed
1/4 cup granulated sugar
1 large egg
2 teaspoons vanilla extract
2 1/4 cups all-purpose flour
2 teaspoons cornstarch (Or 
Glucomannan powder. I know we didn't use 2 teaspoons, we used much less.)
1 teaspoon baking soda
pinch salt, optional and to taste
1 to 1 1/2 cups semi-sweet chocolate chips or chunks (We just had chips, and they worked fine. Although, I think the chucks would be great! =D )

DIRECTIONS:

  1. In a mixing bowl, combine the butter, cream cheese, sugars, egg, vanilla, and beat on medium-high speed until well-creamed, light and fluffy.
  2. Stop, scrape down the sides of the bowl, and add the flour, cornstarch, baking soda, optional salt, and mix until just combined, about 1 minute.
  3. Add chocolate chips and/or chunks, and beat momentarily to incorporate, or fold in by hand.
  4. Using a 2 inch cookie scoop, form heaping mounds. Place mounds on a large plate, flatten mounds slightly with your palm, cover with plastic wrap, and refrigerate for at least 2 hours, or up to 5 days, before baking. Do not bake with warm dough because cookies will spread and bake thinner and flatter. (If I remember correctly, I did not refrigerate my dough, and the cookies were fine.)
  5. Preheat oven to 350 F (about 177 C) spray your baking sheet with cooking spray or butter and place mounds on baking sheet. Bake for 8 to 9 minutes, or until edges have set and tops are just beginning to set, even if slightly under cooked, pale and glossy in the center. (I had to bake mine for a little longer, just bake then according to your liking.)  Allow cookies to cool on the baking sheet for a little before removing and transferring to a rack to finish cooling.
  6. Enjoy your cookies! Let me warn you, they disappeared FAST over here! :D I think I made a double batch. :)


Sunday, December 23, 2012

Announcing...

THE JEWELS OF JESUS MAGAZINE, ISSUE #4!!!

Yes, it's finally here!

All the people who get a print copy received theirs last Tuesday, but I haven't had time to post until now on here. I hope you will forgive me. :)

Read/download your free copy here!

Lord willing, I will be starting to put the next issue (#5) together this week, even though it won't be finished until February or March. Several things we will be needing yet:

  1. a short story from the Bible, retold (it can be first- or third-person. Doesn't matter either way.)
  2. a couple poems for the Encouragement Page
  3. several quotes for the Encouragement Page
  4. a recipe (or two!)--just make sure that they are fairly easy to make. Preferably ones you've made before.
  5. a short thought, something God's shown you, an answered prayer--doesn't have to be longer than one paragraph. We'd use them to fill up the gaps at the bottom of pages.
NOTE: If you send in any of the above that you haven't written, please give us the source--we'd like to see where you got it! ;)

Stay true to Him,
Esther

Tuesday, September 25, 2012

Recipes Wanted

Hello, all you dear readers!

I'm slowly working on putting together the next JOJ magazine (fourth edition), and thought for this issue we'd like some recipes!

And, of course, your help is needed...do you have any fairly simple and easy recipes to share with us today? If you prefer, you can comment, or feel free to contact us. And please, either way you send it to us, include a little "about me" at the end. It doesn't have to be fancy, but it's nice to know the people behind the recipes--not just the recipes themselves! It helps build sisterhood.

Here's a recipe for you to try today:


Oh, yum, yum! I'll have to make those again!

Looking forward to your submissions!

For now, 
Your loving sister,
Esther